 Perhaps I should re-title this as fast start in 15x1 hour evenings, they are pretty intense hours! You're probably not going to be able to do it all in 2 x 7.5 hour days, I think your brain would melt! You also have to wait several days for your account to be reviewed after you apply to each site. I've written this for the amateur photographer who is interested in getting a fast track start into microstock and earning some cash from their photos, but this is still a valuable workflow for a professional who has little experience with microstock.
 A couple of assumptions:
You already have a good collection of images that can be used as stock photos (even if that is just 15 or 20 images). They are well organised on your hard drive so you have access to them, either digital or ready scanned from slide film. Scans of prints or consumer print film will probably not be accepted due to the poor quality of images in these formats. Read more about the kind of image subjects that sell well as microstock.
I have not included upload waiting time, which will depend on the upload speed of your internet connection, but that is time you can spend doing something else...
I will also add the caveat that I really do recommend uploading to more than the 4 sites I have listed here (6 or 8 would be typical), but you will soon realise that just 4 sites is still a lot of work to upload to, so for the 15 hour startup we will work with just the top 4 sites and see how things grow from there. The focus is on working smarter using software tools and analysing which images are accepted.
![]() Hour 1
Hour 1
 Select 5 of your very very very (yes very) best images, and I mean that; these images will be used by the editors at the microstock site to judge the quality of your work and decide if the subjects you are shooting are suitable for stock images. Every photo should be from a different shoot or subject and each should showcase the best of your photography talents. Each image must be crystal sharp, blur free, correctly exposed, good composition, perfect in fact in every aspect - go for conventional stock or editorial shots not arty, grainy or abstract shots, high or low key that might appear to be just badly exposed. It's fine to try those styles of photo later but not for the initial signup phase. If the images contain people then you will need a model release if you want to sell them; the images should not contain copyright or trademark subjects, recognizable property like iPhones, company logos etc.
Write a few sentences to describe the type of photos you create, the equipment you use, and something about what makes you special as a photographer; perhaps a combination of your hobby, love of the outdoors, love of music and event photography or food etc. These few words will distinguish you from someone who is just uploading an image of their cat and hoping to make a few dollars from it. You act professionally and this is how people are going to know it. You will be able to add this info to your profile once you have signed up to a microstock site.
In-depth article about the microstock photographer application process
![]() Hour 2
Hour 2
If you already have a Paypal account this is a very easy hour... just a couple of minutes reading!
Getting paid. I strongly recommend paypal as the option to receive your microstock earnings. It is most convenient, and as a microstock photographer you will get a stream of relatively small (at first) payments either monthly or for the less popular sites perhaps each few months when you have earned enough to receive a payout. As you will see you have to wait until you have earned 50 or 100 USD to request a payout or have it sent automatically. The larger sites allow payment by cheque or perhaps bank transfer in some countries, this is fine but it's harder to keep track of, and you will be spending more time on administration that is earning you nothing.
You can sign up for a Paypal in most countries at paypal.com. The email address you provide to Paypal is the address that the microstock sites will use to send you money, so use this address where requested by each site you apply to in their account payment options.
![]() Hour 3
Hour 3
Signing Up.
Prepare a small avatar image of yourself to include in your profile, this again adds professionalism and makes you look more credible (it should be a picture of your face). Needless to say you should fill out all the profile details with your location and as much information as you can, you do not want to look lazy while the spotlight is on you, nor do you want to look like a spam account / fake registration).
When applying to become a photographer most microstock sites ask for some sample photos, perhaps not all five of the ones you have prepared. Alternatively they will review the first images you upload as samples. So upload as many of the 5 as you can. Some sites ask you to pass questionnaire, the requirements change from time to time. It might take quite some time to approve your application to become a photographer. If you can't answer the questions then it's time to go back to photography school and do some more reading. If they reject you because of the quality of your photos then don't become disheartened (especially if it is just one site that has rejected you) you probably have a few things to learn. I'd suggest seeing how your work is reviewed in the smaller sites (the big sites are very critical of the photos they accept). I frequently get photos rejected, it's just part of the process each site has to maintain quality and image style in the microstock marketplace.
Start by signing up to istock/getty, (sell images link at the bottom) once you are signed up as a photographer and have uploaded your initial review photos familiarise yourself with the site and how it works.
Verifying your ID
 It's become almost universal among the major microstock agencies to request some kind of verification of your identity and country of residence. Most US based agencies also want you to complete income tax forms. If you are a contributor from outside the US, you will discover that agencies are bound by US law to withhold tax at 30% from your royalties for sales to buyers located within the US. Many countries have a tax treaty with the US which reduces or removes this withholding all together.
I've found a scan of my drivers license is accepted by all agencies as proof of my identity and country of residence. I stamped my scan with copy/scan in large translucent letters over the top, although If I ever thought that any of the agencies were not acting securely I'd never have sent it to them in the first place.
It's likely you can skip identity proof / tax forms for the time being, but at most agencies you will need to attend to them before be you can receive a payout.
![]() Hours 4 & 5
Hours 4 & 5
Using the same process as step 3 (istockphoto), signup and upload your first review/application images the following three agencies.
Once you are signed up for each site and have confirmed your email address as needed, you will need to complete all the details you can in your profile, upload your avatar and upload your initial review photos. Then familiarise yourself with each of the sites and how it works, it takes a little time as each site has a unique style, also check each site to see if there is an option for FTP upload, if so turn it on or apply for an account (remember this is all free, I'm not trying to peddle something here).
You will perhaps have to wait a week once you have signed up to become a photographer for your application to be reviewed.
If you are wondering why we chose these agencies read our post about recommended agencies and also see our list of all the microstock sites we have reviewed, where we also provide an in depth review of each site.
![]() Hour 6
Hour 6
Now it's review time, assuming all the sites have accepted you (not necessarily all your photos, but you as a photographer) then we can jump right ahead to the next hour and start key wording.
But I was rejected?
 If you were rejected completely by all the sites then we have a problem, it looks like your work was not at all acceptable. As you signed up to several sites you should have a good idea of what is wrong, it will probably be technical, perhaps it's the quality of the images from your camera. You could use the rest of this hour to signup for some of the sites lower down the list of all microstock sites so that you have four sites that you are able to submit to, but I recommend you should go away and select better sample images and try again for a second time. Many starting photographers try more than once to get accepted by the big micro-stock agencies. We have some advice on the most common technical reasons for photo rejection.
The top 4 sites I have recommended here have at least 100 million images each, and their acceptance levels are very high, don't let this put you off trying to sell your work. The smaller microstock sites might still be a place to start. Sites like the ones I've listed below will accept your images more readily as they are still growing their image collections, BUT be aware that in some respects these sites might be a gamble (with your time) and at present they certainly do not generate the same income per photo that the top sites do.
Mostphotos accept all images (be careful with trademarks etc.) limited sales.
123rf been around for years, 'slow income'
Bigstock, 'steady and sure'
DepositPhotos, fast growing 'new' agency
Do read the reviews first, some of these sites I would not generally recommend to contributors if they are accepted at the bigger sites.
![]() Hour 7
Hour 7
Keywording, first up we need some software to apply our title, description and keywords to each image we will be selling. You can do this manually on each site you upload to but you will soon see that it is better to embed the keywords into each image so I will explain. I use Adobe Photoshop and Adobe Bridge (which comes with Photoshop) it's the tool of choice for professional photography, but NOT a requirement. I recommend Photoshop, you will save a lot of time using Photoshop instead of learning a free software tool, then relearning another software tool when you outgrow it, there is always a price to pay with free software be it advertising, nag screens or lack of features. Google Picasa is one option which might work. There are lots of other free tools available but don't worry, I am going to suggest one to use in the next hour.
You will probably never have set IPTC XMP keywords/title inside a .JPG image so use the rest of this hour to review how it's done and what it's all about in our guide to Image Keywording Software. Even if you don't have Photoshop in the next step I will show you a web service that allows you to edit your files metadata details, and even if you have Photoshop to keyword with we will use this web software to upload our images in batches to our selected microstock agencies.
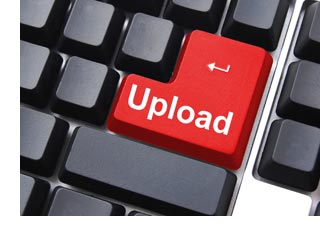
![]() Hour 8
Hour 8
By now you should have some idea about how to apply IPTC keyword metadata to your images. In this step we look into how we upload images to each agency. All agencies have an option to upload images through their site via a web browser - that works fine for a few images but it is time consuming, it will also give you a false idea of how much work is involved in upload images. Very few regular microstock contributors upload to each site in turn using the web interface simply due to the amount of time it takes.
Picworkflow is a web based image management and distribution tool, read my Picworkflow Review. For the purpose of this guide there is no need to pay anything to use it; there is a generous 100 credit per month free option which will allow for the distribution of the images needed for this quick start guide. Picworkflow is the service I use for all my keywording (outsourced) and uploading. I've not made picworkflow a "hard requirement" of this guide because I'd prefer not to frighten people away at first with a paid service (you pay for convenience in this life!). I highly recommend you give it a free trial - it is a real time saver for multiple agencies and especially when you use their paid keywording and title/description service rather than write the descriptions yourself.
Alternative: You can skip the (highly recommended) picworkflow and use your own software for keywording and manually upload to each site or use FTP software to upload batches of images. In this case you will have to work your way through the remaining hours making appropriate changes to the process along the way.
Another Alternative:
The combination of the free prostockmaster software, and a paid syndication service Lightburner to distribute your images (they offer a free 30 trial).
For this hour, read the above guides and reviews; choose how you want to proceed. For those continuing with the recommended picworflow option, register a user account and see if you can upload a couple of images to picworflow, "upload via flash" lets you try things out without setting up FTP to upload the images. Have a little play around to see how it works but don't distribute anything just yet!
Select "Distribute -> Manage Logins" option and insert the usernames and password that you setup for the agencies in hours 3 - 5.
![]() Hour 9
Hour 9
Do the keywording: start by reading Titles and Descriptions that Sell and Keywording Nirvana.
Select 5 images that you think will sell. There is now another decision to make: You can either title and keyword your images on your own computer then upload; or upload them to picworfklow and add the information to them in picworflow.
I Regularly pay to have my images keyworded and titled, and so that I have a copy of the completed image for my own use at a later date I use the picworkflow free "loopback" distribution which allows me to download a copy of my completed images via FTP.
| How to Choose: | Pros | Cons |
|---|---|---|
| Keywording Software (adobe bridge prostockmaster etc) | You have a copy of your original images without having to download them after keywording is done. | Need you have software installed |
| Keywording Service (picworkflow, outsourcing etc) | No need for any software Can do keywording from anywhere with internet access e.g. in your lunch break Workflow allows to outsourcing with minimal change | You need to download completed images so you have a copy of each image complete with title keywords for future use |
Use picworkflow (or your chosen tool / upload service) to keyword, title and describe each of your 5 images you think will sell well. Include at least ten keywords and a description of at least seven words, some images will easily have many more keywords, some you will struggle just to find ten.
Picworkflow offers you some help in this process with a spellchecker, keyword suggestions and a pre-flight checklist that highlights problems / will not distribute images that do not meet minimum metadata requirements.
![]() Hours 10 & 11
Hours 10 & 11
 Distribute each image to each agency. The great thing about having software or a web service to assist your upload is that you don't have to visit each site to upload images. You do still have to visit the sites to set categories but the software takes the tedious repetitive steps out of the process.
In picworflow click the distribute tab and select each of your images, then click each agency you want to distribute to (this will fill the matrix with pending tasks). Finally authorise the distribution of the images.
Sit back for a few minutes while the images distribute. We will use the rest of the hour once the upload has completed; some agencies servers take a while to "see" and process new uploads once they have been distributed to them.
... it might take 20 minutes to finalize everything.... time you can spend doing something else....
Once the uploads have completed log into each of your 4 microstock sites and find the 'pending uploads', 'process FTP uploads', or 'submit for review'. Each site is different and changes from time to time, but somewhere you will see your 5 images and be able to add categories and choose license options. The first time round this will take you quite a bit of time, you will not understand some of the license options and will want to go and read more about it on each site. I have left the remainder of hour 10 and the whole of hour 11 for this. Depending on how you go it might take longer or it might take much less time if you are already familiar with some of the Stock photo terminology.
Once uploaded your 5 images will enter the review queue, these can be a week long, in the next hour we will upload 5 more and then wait to see what happens....
![]() Hour 12
Hour 12
Second time around it should take you about an hour or less to select 5 more images, keyword, upload them with picworkflow (excluding the upload time) and login to categorise and submit. Remember the limitation of the picworkflow free trial is 100 images per month, e.g. 20 images to 5 different agencies.
Now wait for all your images to be reviewed so that you can see how you are doing. Many of the sites have an estimate of the time it will take to review a picture, often a week or so, but it depends on the number of images you have uploaded. Some sites send you an email when they have reviewed images or rejected them.
![]() Hour 13
Hour 13
So how did you get on? Hopefully some of your images were accepted? 50% is not an unreasonable acceptance rate for a beginner in my opinion, especially if most of your images were accepted at one agency or another.
 Review any images that were not accepted anywhere, and if the rejection reasons were consistent then you should be able to work out where you went wrong. If the images were rejected for completely different reasons on different sites then personally I just ignore it and move on. It's likely that the image is just not a 'usable stock image'. It's difficult to reason when told the image is underexposed at one site, badly composed at another and 'not suitable as stock' at a third. However, if many or all sites say your images are for example "noisy" then look into the reasons why, likewise for any other rejection reasons.
At this point it's very easy to lose faith, in fact when I signed up for istock in 2003 I uploaded 20 or so images, and after some weeks I could see I had made some earnings but not very much. I lost interest and left the site for many months (I forget exactly but I'm sure it was almost a year), when I went back there was about 80 US dollars in earnings and I started to see that there might be something in this! Especially interesting for me was how 50% of it was from just one image. I worked onwards and joined more sites realising that the earnings, while small, would become significant with enough images and enough sites paying me.
![]() Hour 14
Hour 14
Use this hour to upload another batch of five images. By now you should be getting faster at this, perhaps you will be able to complete two batches of five.
At this point you'll want to review how you are uploading, and how you will work in the future, perhaps you set aside an evening to keyword as many images as you can, upload them overnight, then submit for review next evening. Perhaps visiting each site to upload the images in large batches separately using the normal web interface works best for you. Perhaps you prefer to work in batches of five or ten regularly as we have been here. The choice is yours, and as a microstock contributor you will be constantly reviewing your workflow to see how you can save time and make life easier.
Many full time contributors use tools like picworkflow to aid their workflow, others use FTP clients and browser plugins to upload, or even outsource the whole process.
![]() Hour 15
Hour 15
Devote the final hour to reviewing the lists of images that the stock sites want, and more important the images that they do not want - these are almost guaranteed rejections if you upload them. Most of the major sites publish and update these lists. Think about which of these images you can shoot easily with the best results. Then plan your next photo session. You might still have a huge catalogue of existing images on your computer to go through so that might be an alternative to shooting new images for a while.
Again, read our post on the types of photos that sell the best. Also review the sales you have had and see what is selling for you. Experience and ultimately success in microstock comes through continual evaluation of results and improvement in your photography skills. With microstock you can work and learn at your own pace, and having a microstock community supporting you means you can turn to fellow photographers for help and advice provided that you don't ask questions that have already been answered many times before on sites like here at microstockinsider.
Review
 Congratulations! You have signed up to 4 stock agencies, uploaded 15 or 20 images to each and seen the results. Looking ahead, you can either sign up to more of the top 10 microstock sites, or concentrate on the four listed here. Either way you will need 50 or 100 images on each site to make reasonable earnings, and start looking towards getting 250 to have some more serious income. Microstock is not money for nothing, by now you have understood that a lot of time is spent in getting your images online. It is a quite reasonable expectation for microstock to pay for your camera equipment, but only if you work full time or a significant number of hours a week will you be able to earn enough to live on, like any employment if you don't keep working at it you will fail. More about this in how much can I earn from microstock.
Microstock is somewhat like a lottery, you will likely see great results from one of your images compared to all the rest, and you never know which image is going to shoot to the top of your sales list. Look at the popular images on istockphoto and see how many sales they have made then work things out, you likely won't be able to achieve that, but even if you get 1/10th of it you will be going very nicely.
One of the best things about microstock is the flexibility it offers, you can work random hours, work a lot or work a little. Unlike get-rich-quick schemes and scams which usually involve something like signing and folding letters for long hours you will learn new skills and be working at building a valuable image portfolio that you own and will always have a value. Microstock is allowing you to monetize that image portfolio.
Related Posts
16 Things a Beginning Microstock Photographer should know
More guides for Microstock Beginners


flickr
precious (not verified) on Thu, 2008-04-24 22:09I have a question, is it OK
Anonymous (not verified) on Thu, 2008-10-02 05:27same photo many sites
Steve Gibson on Thu, 2008-10-09 05:25yes, you can upload the same photo to many different microstock sites, that's what most microstock contributors do. The only time you cannot upload the same image to other sites is if you choose to become an exclusive photographer or make he image 'exclusive' on to a particular site.
An exclusive photo might earn a higher commission rate but the downside is that you cannot earn from the same image on a different site.
Thanks for this guide, I
Mandy - thephotographerblog.com (not verified) on Wed, 2008-10-22 20:01Uploading
Steve Gibson on Wed, 2008-10-22 23:52Depending on your camera you should be able to upload a jpeg file straight from the memory card, BUT, that depends on you having a good quality camera and getting the exposure and colour correct in camera. Most microstock contributors like to edit their photos to remove any dust or distracting details, correct colours and exposure etc. some also reduce noise and sharpen (but sharpening is not normally recommended) many contributors also shoot in camera raw which allows them more flexibility to edit the images after they are taken such raw images need processing (developing) in software such as photoshop (adobe camera raw / acr)
I don't want to put you off here, if you have some good photos you want to sell then signup to one or two of the sites and see how you go, perhaps try scaling them down (more on this in my post on what type of camera do I need for microstock) remember that there is a big difference between a 'good photo' and one that is a suitable for selling as stock.
Very Informative
Anonymous (not verified) on Wed, 2015-04-08 04:39