 Back in 2005-6 during the reign of the "Microstock Mom" I read words to the effect "I get everything right in camera so that I just shoot, keyword and upload, I don't need Photoshop and I just can't afford the time needed to edit the images".
Then more microstockers bought cameras which took RAW images, the competition got much stiffer and so today to get any images accepted you can be fairly sure that some post processing is needed.
You don't need photoshop if you are just starting out, there are other cheaper image editing and raw processing tools available, you might first look at the raw processor that came with your camera. If you shoot jpeg (seriously consider shooting in camera raw) always keep a copy of the original file if you do any editing. If you are just a microstock newbie then editing images will be a somewhat time consuming and tedious task at first, there is a lot of learning to do, keyboard short-cuts etc, but I've written before that microstock is a great way to learn and skills like image editing are something you can take away and use for personal photos or any other photography related task outside of stock photography - even if you decide that this industry is not for you. I've not covered the basics here of how I actually do the processing, just what I do, there are plenty of 'learn Photoshop sites' you can go away and read.
Understanding that everyone's workflow is different, as is their image style here's what I do with an image once I've selected it as a candidate for upload. For me, some of this processing is done first in camera raw then fine-tuned as needed in Photoshop:
Spotting and Cleaning
Stock Images should be spotless, any little distracting flaws should be cloned out. To the beginner this seems like it's taking things too far (especially when you are using a blower brush to clean table top subjects before you shoot them!). Once integrated into 'something you do' each time you open an image it typically take less than a few minutes with the clone stamp or the spot healing brush tool to get rid of sensor dust (time to clean your sensor), specs on the background or dust on the subject that was not removed before the photo was taken. It should only take a little longer to remove any things like logos or license plates that could not be covered up at time of shooting.
Straighten Things Up
In an ideal world you took it straight to begin with and your lenses make everything look perfectly square and true, if not then remove lens distortions (if they are noticeable) make horizons straight (unless they are intentionally well off level) and correct any perspective distortions if you feel the image would benefit (we can't all afford tilt shift lenses!).

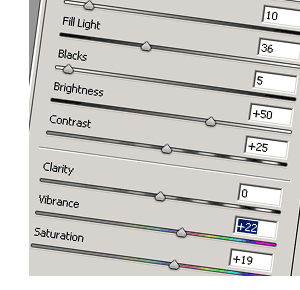
Boost Colour and Contrast
Getting the lighting right and perhaps using a polarizer if shooting outside should mean that there is only fine turning of exposure and contrast needed. Glossy colourful images seem to sell better so I have to put my personal tastes to one side and turn up the colour "as much as I can get away with". Be careful doing that as it can lead to the image breaking up in bright saturated areas, this and any other problems should be fairly obvious when you check over the image at 100% zoom before saving it.
Isolations and Clipping Paths
Optional, and dependant on the subject, I can't find any evidence that a clipping path increases sales. I did add clipping paths to most of my isolated on white or black subjects for about a year, didn't see anything obvious when it came to increased sales. If you do include a clipping path you might also need to include 'isolated' or 'clipping path' in the keywords. Some agencies strip out clipping paths from images as they are resized before sale. Clipping path or not you should make sure that any objects 'cut out' on white or black are cleanly isolated by using a levels adjustment (slide the black slider almost all the way to the right).
Colour Fringing and Specular Highlights
Subjects with bright highlights or high contrast edges, especially at the edges of the frame (and depending on your lens) can create ugly fringes of colour (chromatic aberration) that need attending with the sponge tool. Digital cameras can also generate ugly artefacts on bright/burnt out spots these can be discretely smoothed away with the blur tool reducing your chances of "compression / artefacts" rejections.
Things I Don't Do
- Sharpening, other than what camera raw does - I very rarely do any sharpening.
- Noise Reduction, I shoot at ISO 100 Only, More on noise reduction and artefacts from post processing.
- Cropping, usually not, but it's sometimes a side effect of straightening and image or getting those parallel lines all... parallel! - again this should be a 'get it right in camera' adjustment.

Time is Money
I evaluate on the fly how much time I will spend on each image, but it's rarely more than 10 minutes, in fact 10 minutes is probably the amount of time I'd expect to spend on editing and keywording. Some images just don't turn out how you planned, and if possible it's best to go back and re-shoot unless a paid model was involved etc. Sometimes you can rescue an image by processing it, but it's getting ever harder to get those images past the image inspectors and their pixel peeping scrutiny. Occasionally if an image is worth trying to rescue then I will but do it too often and you risk damaging your acceptance or approval rate.
The time you spend depends on what you shoot, if you do a lot of isolated subjects you might spend longer, as you will if you create conceptual images stripping together several different photos, changing background or replacing a cloudless sky with a few clouds etc.
Related Posts
Workflow introduction by example
Dirty Sensor: Reasons for Rejection


It's quiet in here! Add new comment